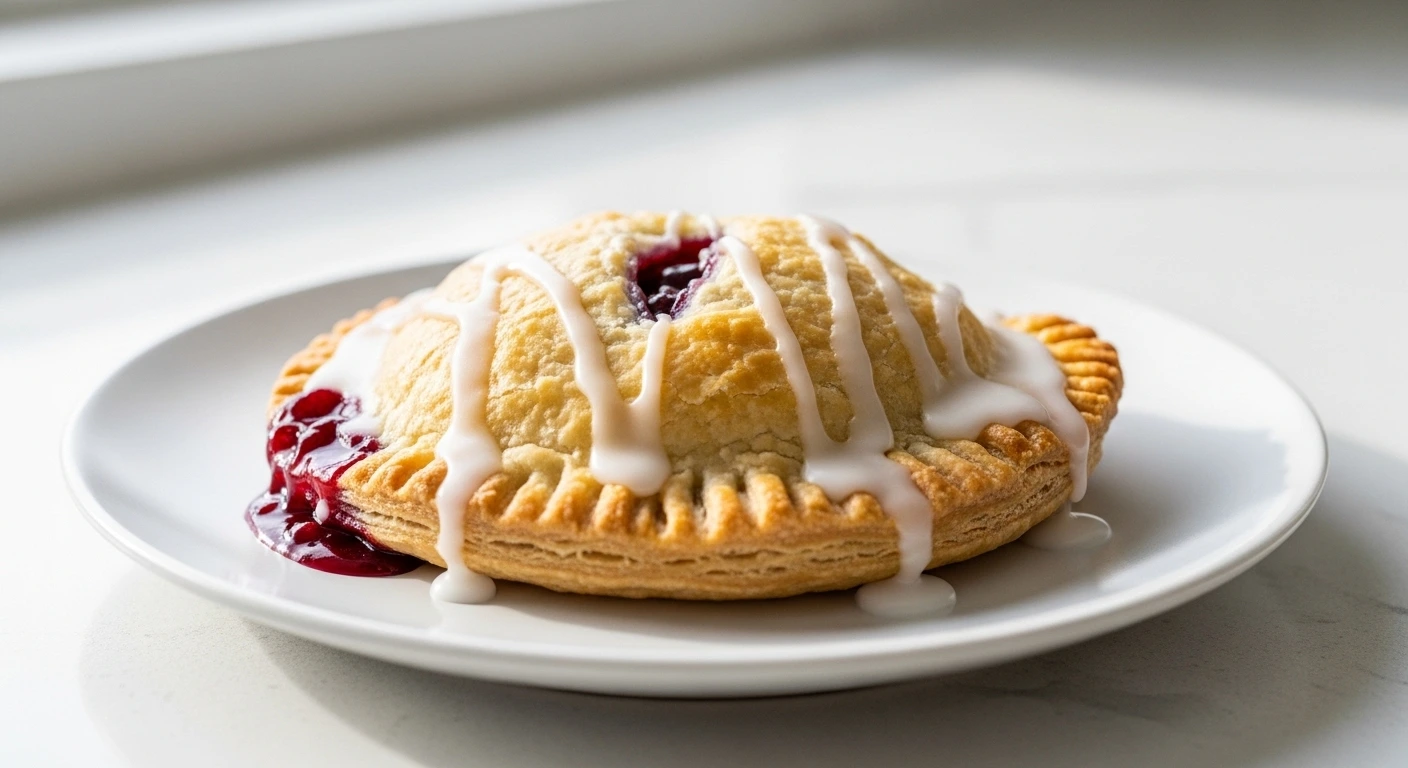
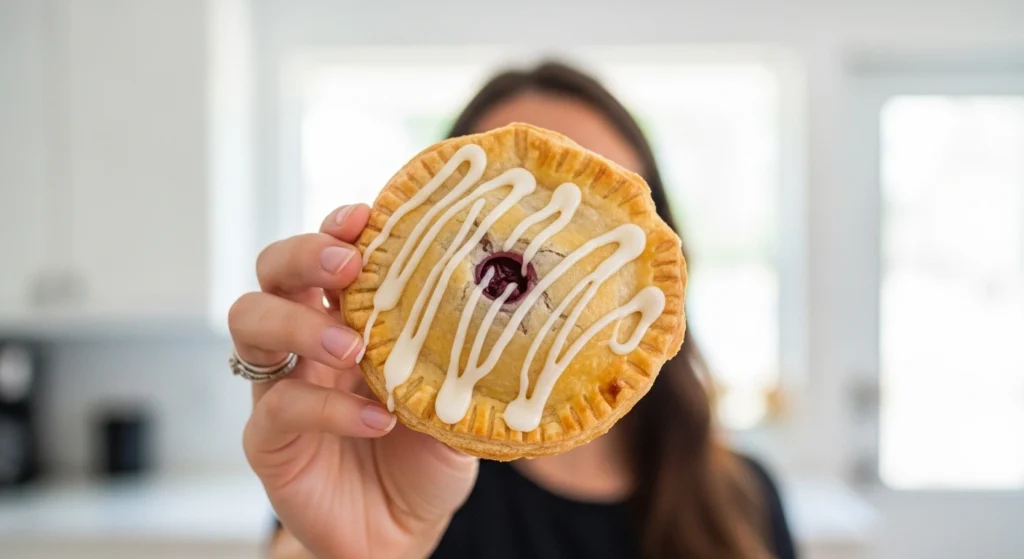
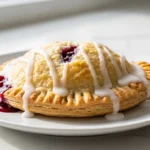
If you are looking for a show-stopping dessert that takes minimal effort, these Cherry Hand Pies are exactly what you need. They are crispy, incredibly flaky, and packed with a sweet and tangy filling.
I remember last weekend when my family was begging for a homemade fruit pie. I honestly did not have the energy to chill and roll out a traditional pie crust from scratch!
Instead of spending hours in the kitchen, I grabbed some store-bought pastry dough and made these individual treats. They disappeared from the kitchen counter in minutes!
They actually reminded me of the time I made my favorite Blueberry Oatmeal Crumble Bars. Both recipes give you that comforting, fruity dessert fix without the fuss of a traditional pie pan.
Let me show you how to make this incredibly easy cherry pie recipe right in your own kitchen!
Table of Contents
Why You’ll Love This Cherry Hand Pies Recipe
Finding a reliable, crowd-pleasing dessert can sometimes be a challenge. But these Homemade cherry hand pies take all the guesswork out of baking.
Here is exactly why this recipe will become your new go-to sweet treat:
- Incredibly fast: Using pre-made puff pastry saves you hours of prep time.
- Perfectly portioned: Individual pies mean no messy slicing or fighting over the biggest piece.
- Kid-friendly: Children love desserts they can easily hold in their hands.
- Hidden cheesecake layer: The sweet cream cheese filling takes these to the next level!
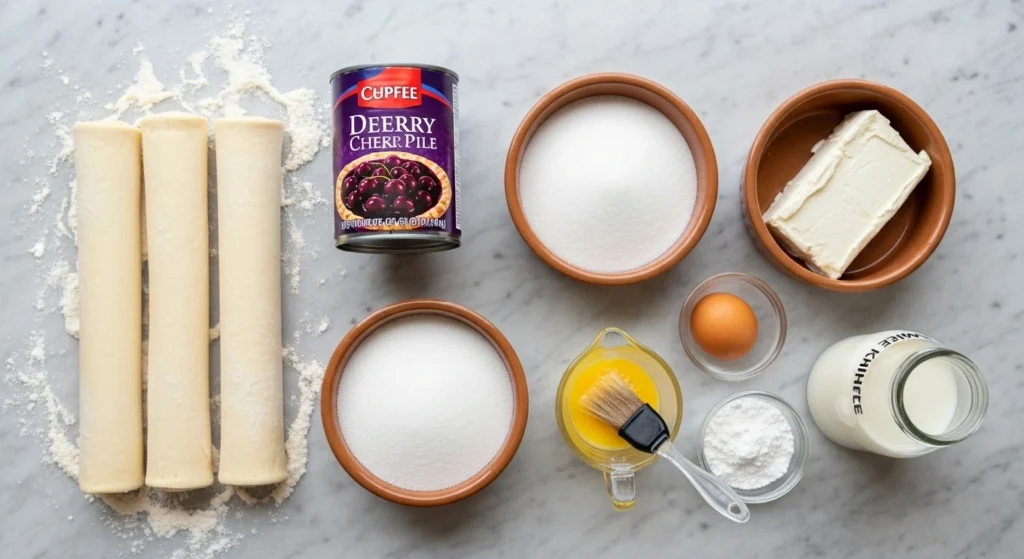
Ingredients You Need
You do not need a massive grocery haul to make these Cream cheese cherry pastries. Just grab a few simple staples from the store.
Here is what you need to gather:
- Puff Pastry: You will need one package (17.3 oz) of good quality puff pastry sheets. Make sure they are fully thawed according to the package directions before you begin.
- Cherry Pie Filling: Making hand pies with canned pie filling is the ultimate baking shortcut. One cup of your favorite brand is all you need.
- Cream Cheese: Grab a 4-ounce block of full-fat cream cheese. It must be softened to room temperature so it mixes smoothly.
- Granulated Sugar: This sweetens the cream cheese to create that beautiful cheesecake flavor profile.
- Egg: One beaten egg creates the egg wash. This gives your Puff pastry cherry hand pies that gorgeous, golden-brown shine.
- Powdered Sugar & Milk: You will whisk these two ingredients together to create a simple, sweet glaze for the topping.
Step-by-Step Instructions
You will be amazed at how quickly these Cherry turnovers with puff pastry come together. The process is simple, fun, and completely foolproof.
Step 1: Prep your space. Preheat your oven to 375°F (190°C). Line a large, rimmed baking sheet with a piece of parchment paper.
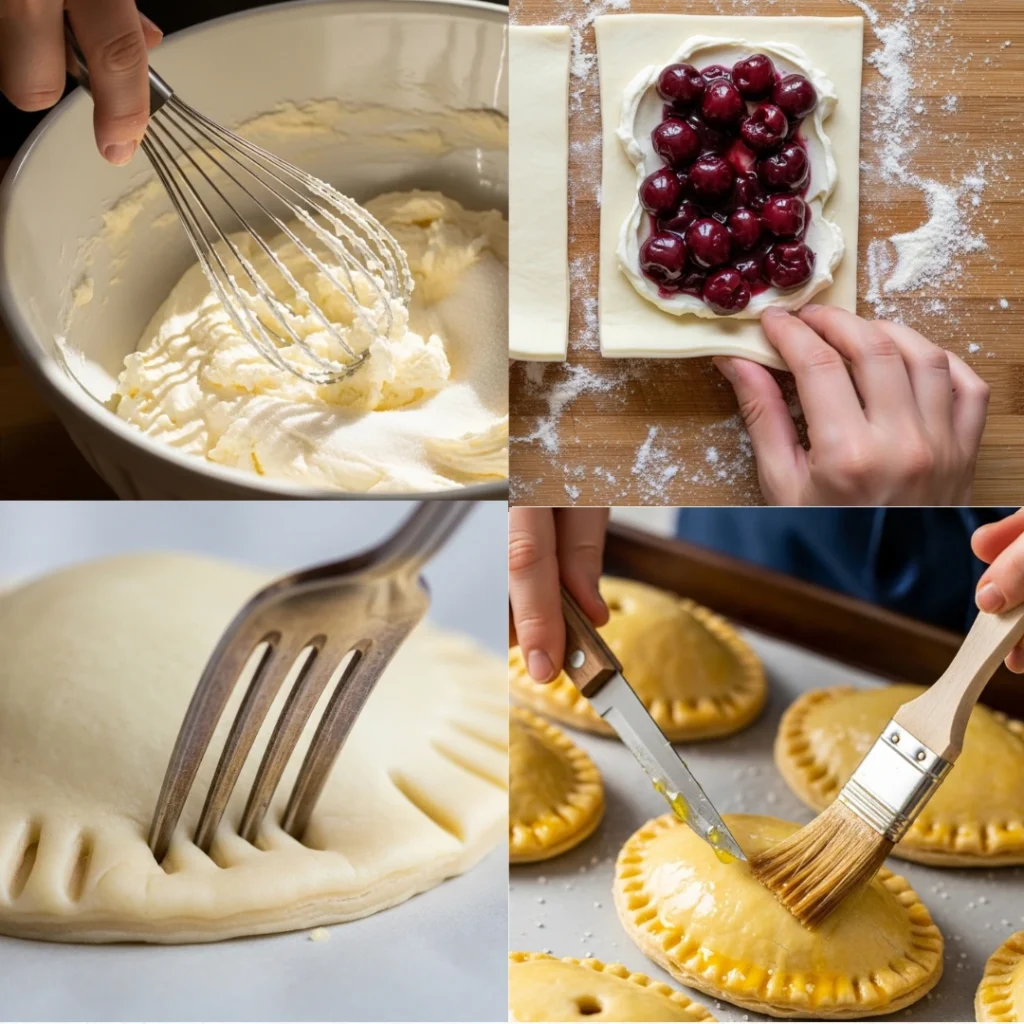
Step 2: Make the cream cheese layer. In a small mixing bowl, use a hand mixer to cream together the softened cream cheese and the granulated sugar. Beat until completely smooth.
Step 3: Cut the pastry. Unroll one thawed puff pastry sheet onto a lightly floured surface. Use a sharp knife or pizza cutter to slice it into 6 equal rectangles.
Step 4: Add the filling. Spoon a layer of the cream cheese mixture onto three of the pastry rectangles. Leave a ½-inch border around the edges so you can seal them later.
Step 5: Top with cherries. Spoon a generous layer of the canned cherry pie filling directly on top of the cream cheese layer.
Step 6: Seal the pies. Place the remaining three pastry rectangles over the filling. Use your fingers to gently pinch the edges together.
Step 7: Crimp the edges. Flip each pie over and gently tuck the pinched edges underneath. Then, use the tines of a fork to press down firmly along the border to seal them completely.
Step 8: Prep the second sheet. Repeat steps 3 through 7 with your second sheet of puff pastry. You should have 6 hand pies in total.
Step 9: Apply egg wash. Transfer all the pies to your prepared baking sheet. Use a pastry brush to lightly coat the top of each pie with the beaten egg wash.
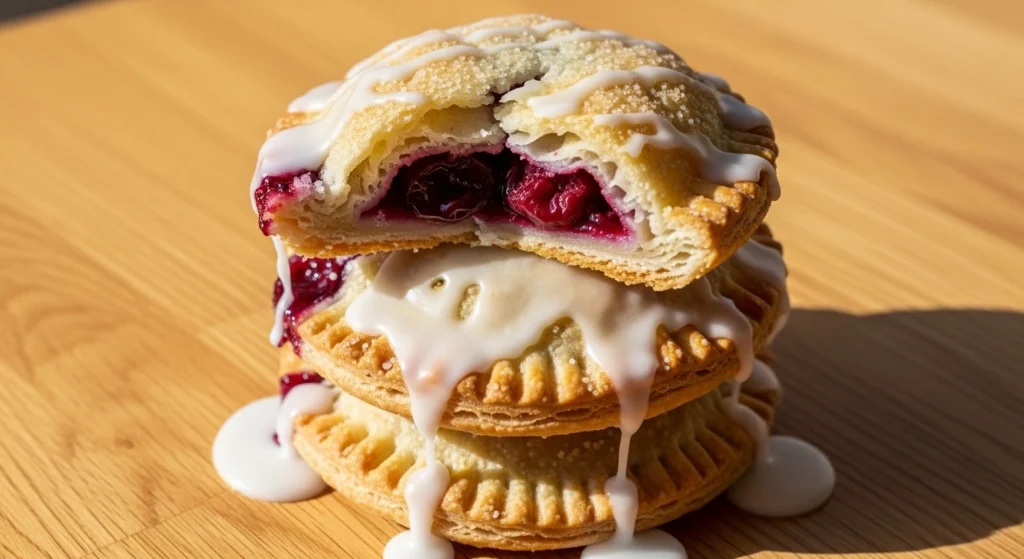
Step 10: Bake and cool. Bake for 18 to 20 minutes until the pastry is puffed and golden brown. Let them cool completely on a wire rack.
Step 11: Glaze and serve. Whisk the powdered sugar and milk together in a small bowl. Drizzle the glaze over the cooled pies and enjoy!
Pro Tips for Perfect Results
Want to guarantee your Cherry Hand Pies turn out flawlessly every single time? Keep these simple kitchen tips in mind.
Do not rush the thaw. If you try to unfold frozen puff pastry, it will crack and break. Let it thaw gently in the refrigerator overnight, or on the counter for about 40 minutes.
Vent the steam. Right before putting the baking sheet in the oven, use a sharp paring knife to cut two small slits in the top of each pie. This allows steam to escape so they don’t explode!
Wait to glaze. Never pour glaze over hot pastry. The heat will cause the sugar to melt and run completely off the sides. Be patient and wait until they are cool to the touch.
Common Mistakes to Avoid
Even an easy baking recipe can have a few pitfalls. Avoid these common mistakes for the best results possible.
Overfilling the pastry. I know it is tempting to stuff them full of cherries! But if you add too much filling, the pies will burst open in the oven and make a massive mess.
Skipping the egg wash. The egg wash is not just for looks. It acts like a glue to help seal the edges, and it gives the top crust that beautiful, professional bakery shine.
Working with warm dough. Puff pastry needs to be cold to puff up properly. If your kitchen is very warm and the dough gets sticky, pop it in the fridge for 10 minutes before baking.
Serving Ideas
These Cherry Hand Pies are incredibly versatile. You can serve them in so many delicious and creative ways!
For an easy summer dessert, serve a warm pie on a plate with a massive scoop of vanilla bean ice cream melting over the top.
If you are hosting a fancy brunch, place them on a beautiful platter next to a towering stack of my fluffy Lemon Ricotta Pancakes.
They also make a fantastic pairing for afternoon tea or coffee! The sweet cherry flavor complements a slice of my famous Ritz Carlton Lemon Pound Cake perfectly.
Storage & Make-Ahead Tips
If you love having sweet treats ready to go, you are going to love how well these store.
Make-Ahead Magic: You can assemble these pies completely, cover them tightly, and keep them in the fridge for up to 24 hours before you need to bake them.
Storing Leftovers: Keep your fully cooled, baked hand pies in an airtight container.
How Long They Last: They are best enjoyed the same day they are baked. However, they will stay fresh at room temperature for one day, or in the refrigerator for up to 2 days.
Can I make cherry hand pies ahead of time?
Yes, you can assemble and bake these cherry hand pies up to one day in advance with great results. They are best enjoyed fresh but stay delicious the next day.
How do you store puff pastry hand pies?
Store your baked hand pies in an airtight container so the puff pastry does not dry out. You can keep them at room temperature for the first day, but it’s best to refrigerate them if storing for up to 2 days.
Can I freeze puff pastry cherry hand pies?
It is not recommended to freeze these specific hand pies once baked, as the puff pastry and cream cheese filling may not maintain their crisp, flaky texture upon thawing.
Can I use regular pie dough instead of puff pastry?
Absolutely! If you prefer a traditional pie crust texture over flaky puff pastry, you can easily substitute it with homemade or store-bought pie dough. Just keep in mind you may need to bake them for 20-25 minutes instead.
Final Thoughts
I am so incredibly excited for you to bake a batch of these Cherry Hand Pies for your next family gathering. They are the perfect balance of flaky crust, creamy cheesecake, and sweet fruit!
Whether you are packing them in a lunchbox or serving them warm for Sunday dessert, they are guaranteed to disappear fast.
If you make these Cherry Hand Pies, I would absolutely love to hear about it! Please leave a comment and rate the recipe down below.
Do not forget to snap a quick photo and share it on your favorite Pinterest dessert board so you always have this recipe saved for later!
For more easy, family-friendly recipes sent directly to your inbox, be sure to sign up for the free EndRecipes newsletter today!
PrintThe Best Cherry Hand Pies
These delicious homemade Cherry Hand Pies make for the perfect pastry dessert! Crispy and flakey puff pastry filled with a sweet cherry filling topped with a sugar glaze.
- Prep Time: 15 minutes
- Cook Time: 20 minutes
- Total Time: 35 minutes
- Yield: 6 hand pies
Ingredients
For the Hand Pies:
-
1 (17.3 oz) package puff pastry sheets (2 sheets total), thawed
-
1 cup canned cherry pie filling
-
4 oz cream cheese, softened to room temperature
-
⅓ cup granulated sugar
-
1 large egg, lightly beaten (for egg wash)
For the Sugar Glaze:
-
⅓ cup powdered sugar
-
2-3 teaspoons whole milk
Instructions
-
Prep: Preheat your oven to 375°F (190°C). Line a large, rimmed baking sheet with parchment paper.
-
Mix Cream Cheese: In a small bowl, use a hand mixer to beat the softened cream cheese and granulated sugar together until smooth and well combined.
-
Cut Pastry: Unroll one thawed puff pastry sheet onto a lightly floured surface. Cut it evenly into 6 rectangles.
-
Add Filling: Spread a spoonful of the cream cheese mixture onto three of the rectangles, leaving a ½-inch border around the edges. Top the cream cheese with a spoonful of the cherry pie filling.
-
Seal the Pies: Place the remaining three pastry rectangles over the filling. Pinch the edges together tightly. Flip the pie over, tuck the pinched edges underneath, and use a fork to firmly crimp and seal the border.
-
Repeat: Repeat the cutting, filling, and sealing process with the second sheet of puff pastry to create 6 pies total.
-
Egg Wash: Transfer all pies to the prepared baking sheet. Brush the tops lightly with the beaten egg wash. Using a sharp paring knife, cut two small slits in the top of each pie to vent steam.
-
Bake: Bake for 18-20 minutes, or until the pastry is puffed up, flaky, and golden brown. Let the pies cool completely on a wire rack.
-
Glaze: In a small bowl, whisk together the powdered sugar and milk until a smooth glaze forms. Drizzle over the cooled hand pies and enjoy!