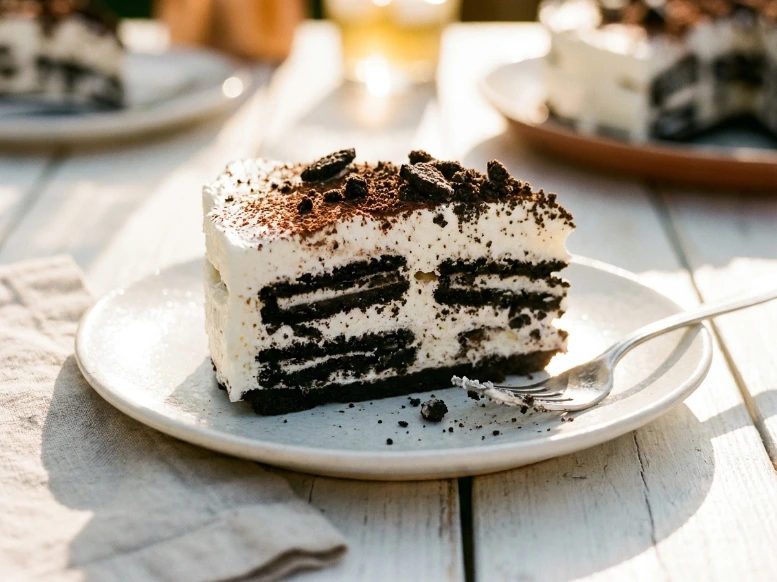
Welcome back to the EndRecipes kitchen! Today, we are tackling a dessert that is nothing short of pure magic: the classic oreo icebox cake.
Last weekend, our neighborhood threw a spontaneous block party. The summer heat was absolutely sweltering. Turning on my oven was completely out of the question, but I still needed to bring a show-stopping treat.
I whipped up this cool, creamy masterpiece in under fifteen minutes. It vanished from the dessert table faster than anything else! If you loved my wildly popular no-bake banana split dessert, you are going to fall head over heels for this recipe.
Let’s dive into how to make this incredibly easy, family-favorite treat.
Table of Contents
Why You’ll Love This Recipe
There is a reason this oreo icebox cake goes viral every single summer. It is truly the perfect easy icebox cake recipe for any occasion.
- No Oven Required: Keep your kitchen cool. This entire recipe comes together in the fridge.
- Minimal Ingredients: This is a brilliant 3-ingredient oreo dessert. You do not need a massive grocery haul.
- Kid-Friendly: Children love helping assemble the layers. It is a fun, mess-free kitchen project.
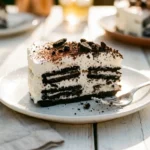
- Perfect Texture: The cookies magically transform into a soft, cake-like texture overnight.
- Total Crowd-Pleaser: I have never met a single person who doesn’t love a classic cookies and cream icebox cake.
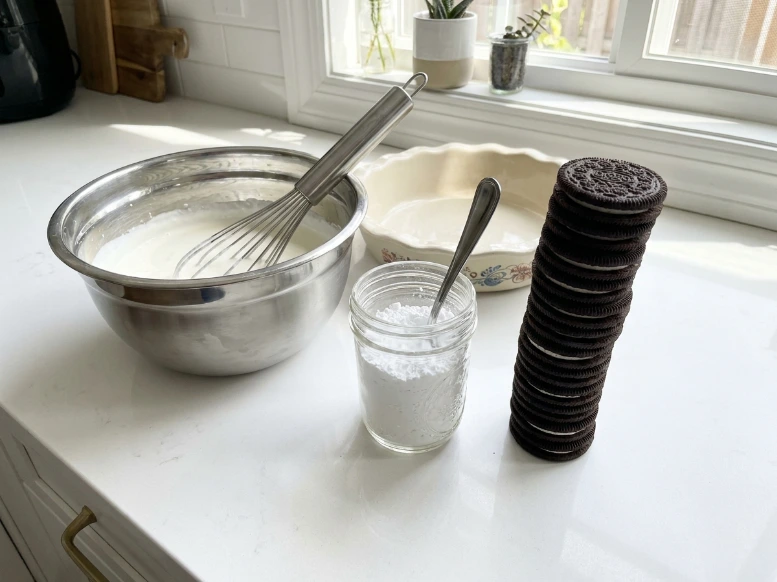
Ingredients You Will Need
You only need a few simple pantry staples to pull this together. Quality matters when the ingredient list is this short!
- Oreo Cookies: You will need one standard family-size package. Classic Oreos work best, but Double Stuf is great too.
- Heavy Whipping Cream: Make sure it is very cold. Cold cream whips up much faster and holds its shape better.
- Powdered Sugar: Just a touch to sweeten the whipped cream without making it gritty.
- Vanilla Extract: A splash of real vanilla elevates the homemade whipped cream beautifully.
Easy Ingredient Swaps
Do you have a dietary restriction in your family? No problem! It is incredibly simple to make a gluten free oreo icebox cake.
Just swap the traditional cookies for a certified gluten-free chocolate sandwich cookie. Most major grocery stores carry fantastic gluten-free options now. Double-check your powdered sugar and vanilla to ensure they are certified gluten-free, too.
Step-by-Step Instructions
Making an oreo icebox cake is mostly just an assembly job. It is practically foolproof.
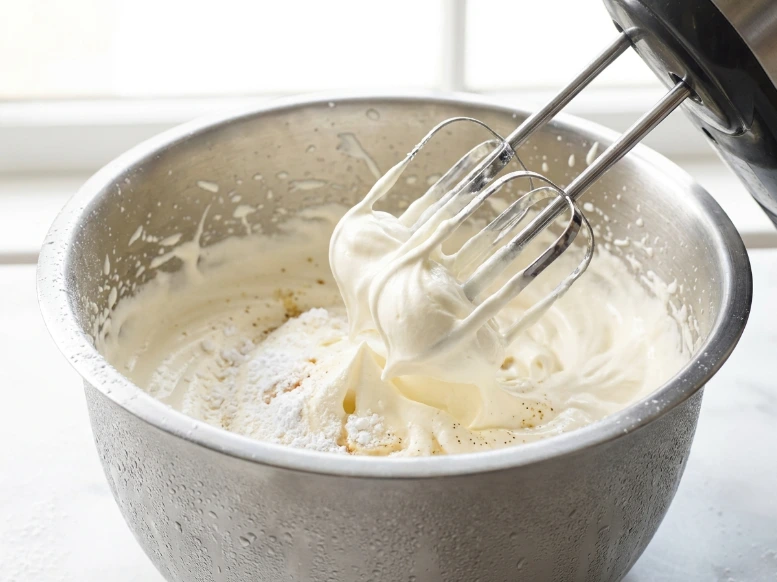
1. Whip the Cream
Pour your cold heavy whipping cream into a large mixing bowl. Add the powdered sugar and a splash of vanilla extract. Whip the mixture on medium-high speed until stiff peaks form.
2. Start the Base Layer
Take an 8×8 or 9×13 baking dish. Spread a very thin layer of your freshly whipped cream across the bottom. This stops the cookies from sliding around.
3. Layer the Cookies
Arrange your Oreo cookies in a single, flat layer on top of the cream. You can break a few cookies in half to fill in any gaps or corners.
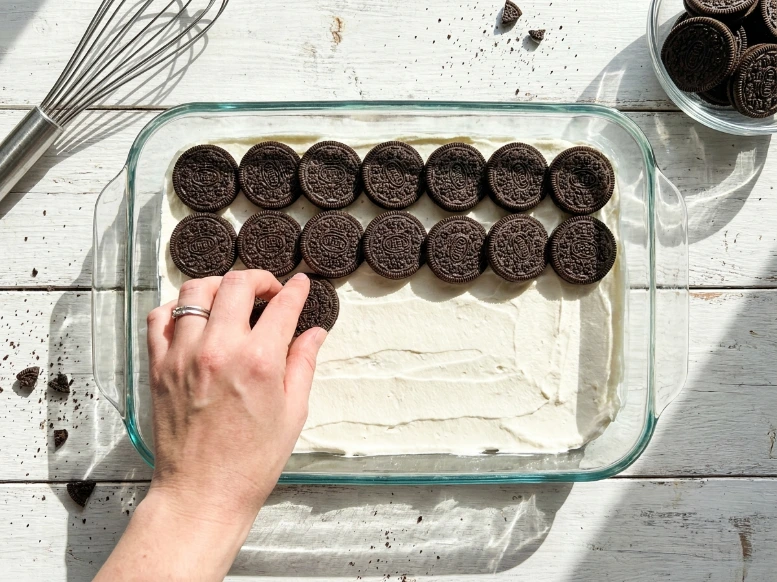
4. Add the Cream Layer
Spoon a generous amount of whipped cream over the cookies. Use a spatula to spread it evenly, making sure every cookie is covered.
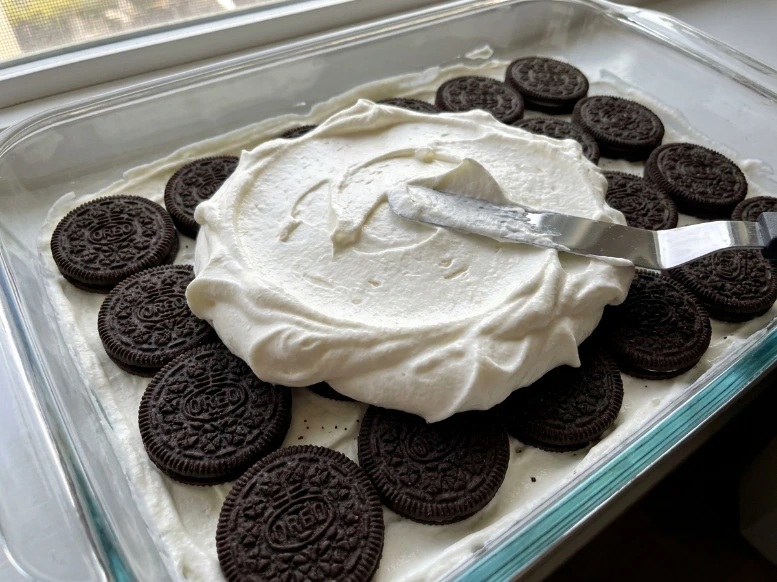
5. Repeat and Chill
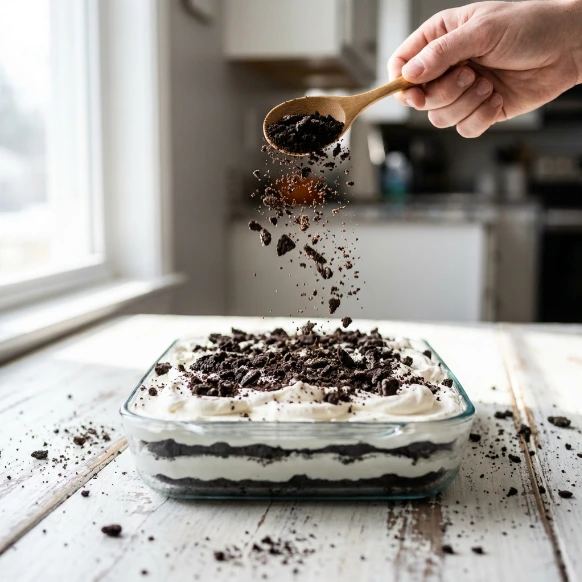
Repeat this layering process until you run out of cookies, finishing with a final layer of whipped cream on top. Cover tightly with plastic wrap and refrigerate.
Pro Tips for Perfect Results
Want to make sure your oreo icebox cake turns out perfectly every single time? Keep these simple kitchen secrets in mind.
- Chill Your Bowl: Place your metal mixing bowl and beaters in the freezer for ten minutes before whipping your cream. Cold equipment equals fluffier cream.
- Dip the Cookies: If you are short on time and need the cake to soften faster, quickly dunk each cookie in cold milk before layering.
- Crush the Topping: Save three or four cookies from the package. Crush them up and sprinkle them over the top layer just before serving for a beautiful garnish.
Common Mistakes to Avoid
Even the simplest oreo icebox cake can hit a snag. Watch out for these common pitfalls.
- Over-whipping the Cream: Stop mixing as soon as stiff peaks form. If you keep going, the cream will separate and turn into butter!
- Rushing the Chill Time: This is the biggest mistake you can make. The cake needs time for the cookies to absorb the moisture from the cream.
- Using Warm Cream: Room temperature heavy cream will not whip properly. Keep it in the fridge until the exact moment you need it.
Serving Ideas
This oreo icebox cake is rich, so a little slice goes a long way. Serve it chilled, straight from the fridge.
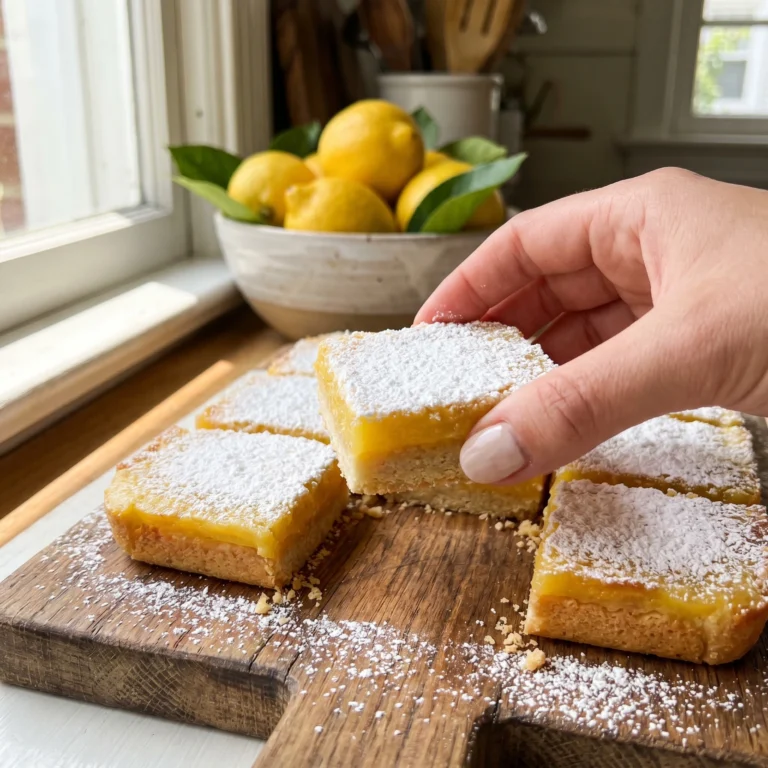
If you are hosting a large summer gathering, try pairing this creamy dessert with something bright and fruity. My tangy lemon bars recipe provides the perfect citrus contrast to the rich chocolate.
Are you serving this at a brunch party? It pairs surprisingly well with a hot cup of coffee and our famous raspberry white chocolate muffins.
Storage & Make-Ahead Tips
If you love make ahead dessert recipes, this oreo icebox cake will become your holy grail.”
To Store: Keep any leftover cake tightly covered in the refrigerator. It will stay fresh and delicious for up to 3 days. After day three, the cookies can become a bit too mushy.
To Make Ahead: Assemble the entire cake 24 to 48 hours before your event. The longer it sits in the fridge, the better the texture becomes! It is the ultimate stress-free party prep.
FAQs
How long does an Oreo icebox cake need to refrigerate?
For the best texture, an Oreo icebox cake needs to chill in the refrigerator for at least 6 hours, though overnight is highly recommended. This essential resting time allows the moisture from the whipped cream to soften the crisp cookies, transforming them into a perfect, tender cake-like consistency.
Can I make an icebox cake ahead of time?
Yes, icebox cakes are the ultimate make-ahead dessert! Because they require extensive chilling time for the cookies to soften, you can easily assemble this cake 1 to 2 days before you plan to serve it. This makes it a perfectly stress-free dessert for parties, BBQs, and holiday gatherings.
Can I freeze an Oreo icebox cake?
Absolutely! If you prefer a firmer texture similar to an ice cream cake, you can assemble the dessert, wrap the dish tightly in plastic wrap, and freeze it. When you are ready to serve, simply let it sit at room temperature for about 10 to 15 minutes so it becomes easy to slice cleanly.
How do I make this Oreo icebox cake gluten-free?
Making this dessert gluten-free is incredibly easy. Simply swap out standard Oreos for certified gluten-free chocolate sandwich cookies, which are now widely available at most major grocery stores. Always remember to double-check that your powdered sugar and vanilla extract are also certified gluten-free to avoid any cross-contamination.

Final Thoughts
I really hope this oreo icebox cake becomes a staple in your summer recipe rotation. It is impossibly easy, incredibly delicious, and guaranteed to put a smile on everyone’s face.
If you give this recipe a try, please leave a comment and give it a star rating below! I love hearing how recipes turn out in your own kitchens. Be sure to pin this recipe on Pinterest so you have it saved for your next family gathering.
Want more deliciously simple ideas? Sign up for the EndRecipes newsletter today so you never miss a new recipe.
Happy layering! — Maya
PrintClassic Oreo Icebox Cake
- Prep Time: 15 minutes
- Chilling Time: 6 hours:
- Total Time: 6 hours 15 minutes
- Yield: 12 servings
Ingredients
-
1 package (14.3 oz) Oreo cookies (regular or Double Stuf)
-
3 cups heavy whipping cream, very cold
-
1/2 cup powdered sugar
-
1 teaspoon pure vanilla extract
Instructions
-
Whip the Cream: In a large, chilled bowl, combine the heavy whipping cream, powdered sugar, and vanilla extract. Use an electric hand mixer to beat on medium-high until stiff peaks form.
-
Prep the Dish: Spread a very thin layer (about 1/4 cup) of the whipped cream across the bottom of a 9×13-inch baking dish.
-
First Layer: Arrange a single, flat layer of Oreo cookies over the cream. Break cookies as needed to fill any empty spaces.
-
Second Layer: Spread about one-third of the remaining whipped cream evenly over the cookies.
-
Repeat: Add another layer of cookies, followed by another layer of whipped cream. Repeat once more, finishing with a smooth layer of whipped cream on top.
-
Chill: Cover the dish tightly with plastic wrap. Place in the refrigerator to chill for at least 6 hours, or preferably overnight.
-
Serve: Just before serving, crush 3-4 leftover cookies and sprinkle them over the top for garnish. Slice and serve cold.